Keycloak
Introduction
Keycloak is an open source software product to allow single sign-on with identity and access management. Keycloak supports various protocols such as OpenID, OAuth version 2.0 and SAML and provides features such as user management, two-factor authentication, permissions and roles management, creating token services. The provenAI ecosystem uses keycloak for authentication and authorization, enabling secure access to its services. Configuring Keycloak, can be a complex task due to its wide range of customization options. However, we choose to use Keycloak because of its many benefits, including its support for industry-standard protocols, comprehensive user management, and the secure token-base authentication Additionally, being open-source, Keycloak offers flexibility and cost-effectiveness, making it a powerful tool for identity and access management.
Configuration
All provenAI services can be set up with docker installation by following the instructions provided here. When the docker-compose for all the services is built and running you can access the keycloak admin console at http://localhost:8880/idp or https://localhost:8443/idp.
Automatic client and realm setup
Step 1: Automatic client and realm setup with docker-compose build.
A script has been developed to create the gendox-idp-dev realm and configure all the necessary clients for the provenAI ecosystem. The gendox-local-init.sh is responsible for:
- Register admin user to keycloak.
- Logging into Keycloak with admin credentials.
- Creating the
gendox-idp-devrealm. - Creating PKCE and private clients.
- Assigning roles to private clients' service accounts.
It also executes the
kcadm.shthat is responsible for: - Setting the correct java executable.
- Executing the Keycloak Admin CLI.
This script is executed by building the docker-compose during the provenAI services installation as described here along with keycloak setup. Once the script is executed a message Script execution finished successfully is logged on the terminal.
Step 2: Log in to keycloak admin console
- Go to the Keycloak admin console at
http://localhost:8880/idp(orhttps://localhost:8443/idp). - Log in with the admin credentials provided in the
env.localthat contains the docker-compose environment variables. The admin credentials are set with the variablesKEYCLOAK_ADMINandKEYCLOAK_ADMIN_PASSWORDin keycloack configuration.
Step 3: Create role users
In the section Realm roles create the role user
| Field | Value |
|---|---|
| Name * | user |
| Description | This is a role for users |
Step 4: Modify Realm Settings
Under the section Realm settings configure the following settings:
-
General Enable
Unmanaged Attributes -
Login
| Category | Field | Value |
|---|---|---|
| Login screen customization | User registration | On |
| Forgot password | On | |
| Remember me | Off | |
| Email settings | Email as username | Off |
| Login with email | On | |
| Duplicate emails | Off | |
| Verify email | Off | |
| User info settings | Edit username | On |
- Email If you want to enable email verification and other functionalities that require an email address you can configure the email settings below:
| Category | Field | Value |
|---|---|---|
| Template | From * | your-email-address |
| Connection & Authentication | Host * | your-smtp-host |
| Port | your-smtp-port | |
| Encryption | your-encryption | |
| Enable SSL | Off | |
| Enable StartTLS | On | |
| Authentication | Enabled | On |
-
Theme Select as login theme
gendox. -
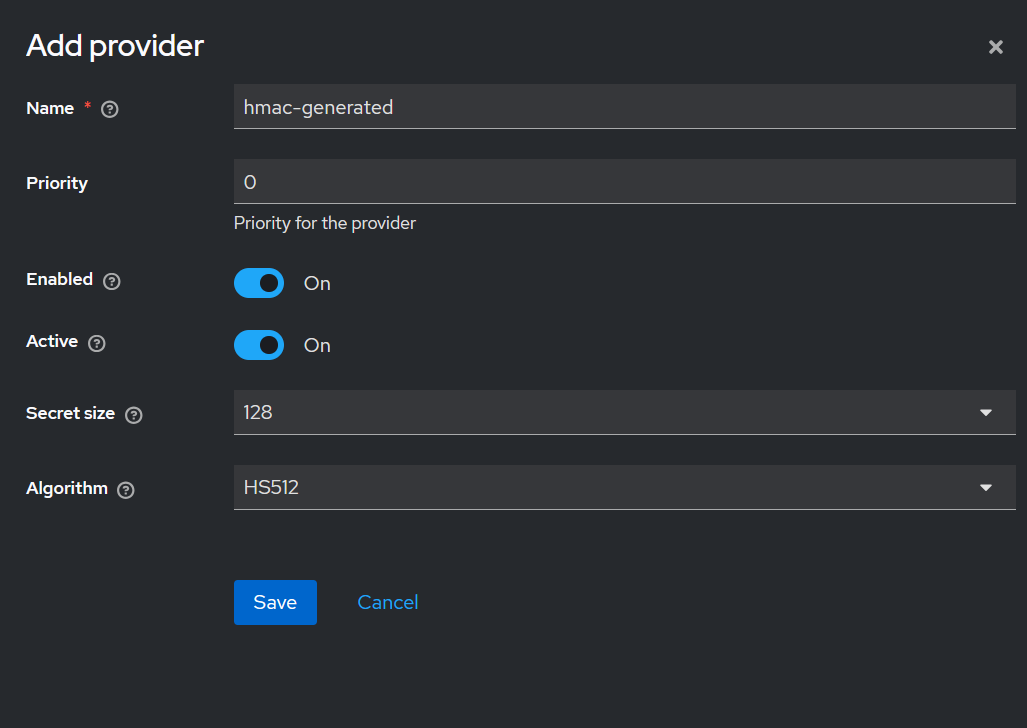
Keys Switch to Add providers. Add
hmac-generated:
| Category | Field | Value |
|---|---|---|
| Edit provider | Name * | hmac-generated |
| Priority | 100 | |
| Priority for the provider | your-priority-description | |
| Algorithm | HS256 |
- Sessions
| Category | Field | Value |
|---|---|---|
| SSO Session Settings | SSO Session Idle | 12 Hours |
| SSO Session Max | 1 Day |
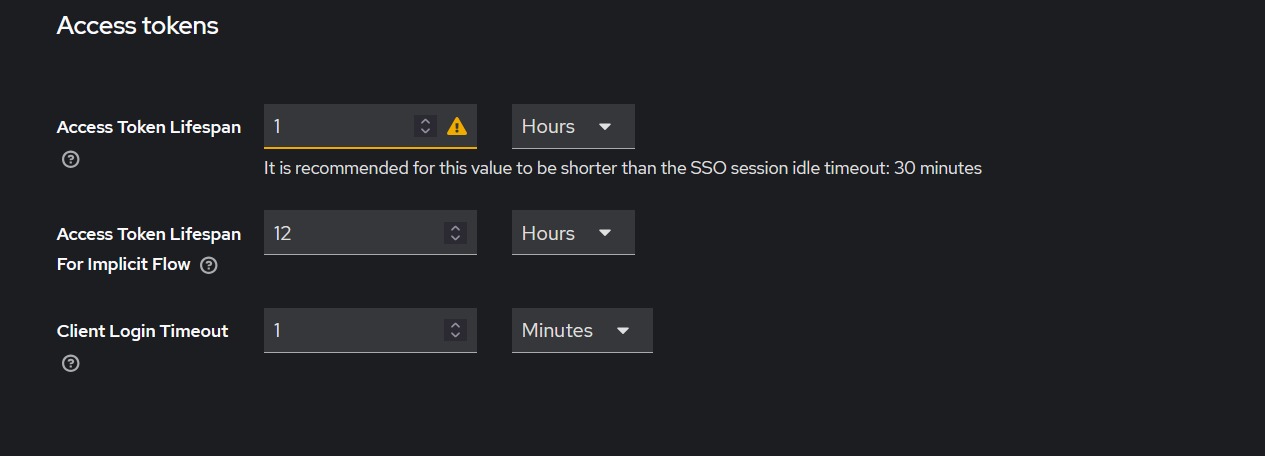
- Tokens
| Category | Field | Value |
|---|---|---|
| Access Tokens | Access Token Lifespan | 1 Hour |
| Access Token Lifespan For Implicit Flow | 12 Hours | |
| Client Login Timeout | your-login-timeout |
Step 5: Authentication Settings
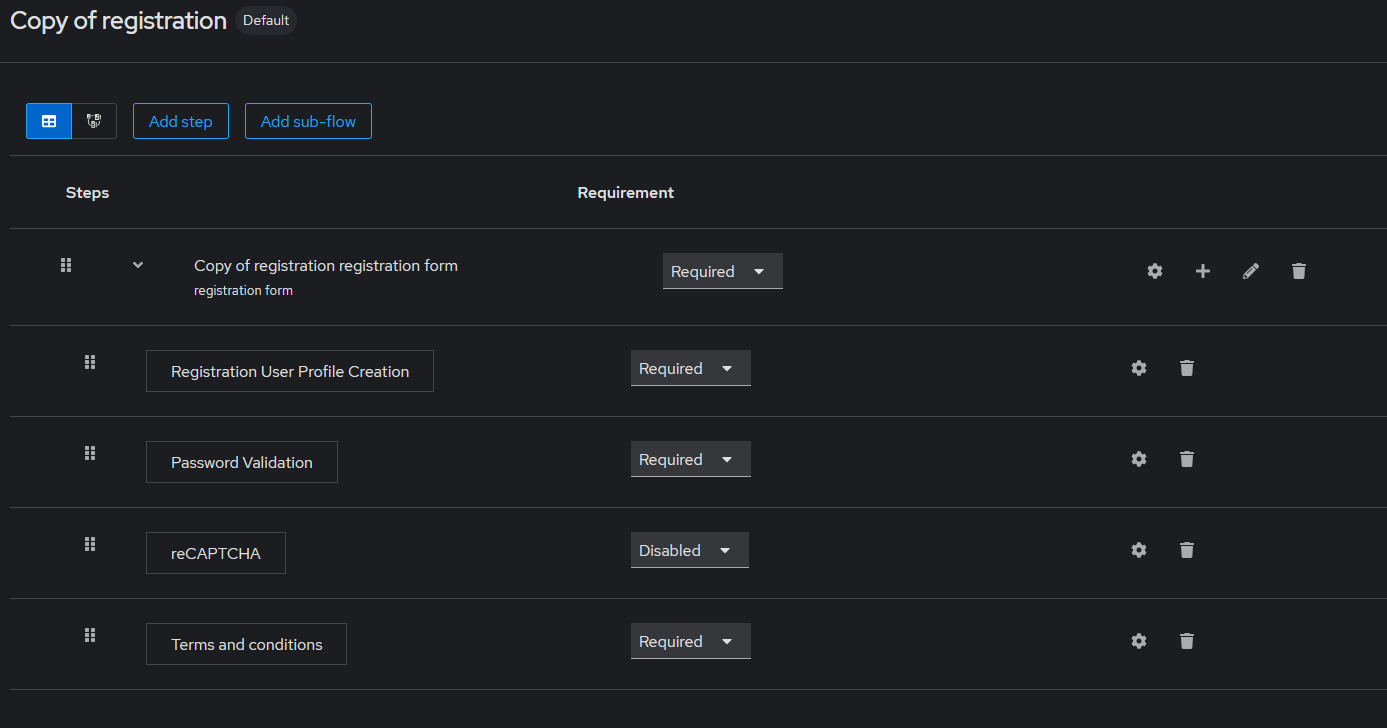
We need to create a Copy of registration flow on flows:
| Category | Field | Value |
|---|---|---|
| Create Flow | Name * | Copy of registration |
Next we need to configure the flows.
- Click on registration flow and duplicate it.
- On the Copy of registration set
Terms&ConditionstoRequired. - Under Action select
Bind flow. Choose as binding type asRegistration flow.
Switch to Keycloak master realm and repeat this process.
Next switch to Required actions. You will need to change the following values:
| Field | Value |
|---|---|
| Terms and Conditions | On |
Step 6: Keycloak environment variables and application properties
AFter configuring keycloak you will need to update the environment variables:
| Environment Variable | Example value |
|---|---|
KEYCLOAK_CLIENT_ID | gendox-private-client |
KEYCLOAK_CLIENT_SECRET | ********** |
The KEYCLOAK_CLIENT_SECRET is found on the credentials tab on the gendox-private-client client.
Step 7: Create proven-ai-private-client and users
For the interaction between the Gendox and ProvenAI services we must create a user in the database for proven-ai-private-client and, following the steps below:
- Implement client log in to Keycloak:
curl -X POST "http://localhost:8880/idp/realms/gendox-idp-dev/protocol/openid-connect/token" \
     -H "Content-Type: application/x-www-form-urlencoded" \
     -d "grant_type=client_credentials" \
     -d "client_id=proven-ai-private-client" \
     -d "client_secret=your-proven-secret"
- Get profile to store
proven-ai-private-client: After receiving the client token you will get the user profile. This API will register theproven-ai-private-clientas a user in the database. Now the client can interact with other services of the provenAI ecosystem.
curl -X GET "http://localhost:8080/gendox/api/v1/profile" \
     -H "Authorization: Bearer $PROVEN_AI_PRIVATE_CLIENT_TOKEN"
-
PROVEN_AI_PRIVATE_CLIENT_TOKEN: The bearer token received fromproven-ai-private-clientkeycloak client log in. -
Change user type to
GENDOX_SUPER_ADMIN:- Go in the database in
usertable ofgendox_coreschema. - Find the
proven-ai-private-clientuser. The user has usernameservice-account-proven-ai-private-client. - On
typestable ofgendox_corefind thetype_idof typeGENDOX_SUPER_ADMIN. Thetype_idshould be 40. - Change the
type_idto the id corresponding to typeGENDOX_SUPER_ADMIN. You can find the id on thetypestable. .
- Go in the database in
Repeat this process for gendox-private-client:
- Implement client log in to Keycloak:
curl -X POST "http://localhost:8880/idp/realms/gendox-idp-dev/protocol/openid-connect/token" \
     -H "Content-Type: application/x-www-form-urlencoded" \
     -d "grant_type=client_credentials" \
     -d "client_id=gendox-private-client" \
     -d "client_secret=your-gendox-secret"
- Get profile to store
gendox-private-client:
curl -X GET "http://localhost:8080/gendox/api/v1/profile" \
     -H "Authorization: Bearer $GENDOX_PRIVATE_CLIENT_TOKEN"
-
GENDOX_PRIVATE_CLIENT_TOKEN: The bearer token received fromgendox-private-clientkeycloak client log in. -
Change user type to
SUPER_ADMIN.
Manual keycloak setup
To manually manage the keycloak settings by not executing the script that creates the realm and clients, you would have to execute all the steps of the script provided.
Step 1: Setup keycloak clients and realm
- Access the keycloak admin console at
http://localhost:8880/idp(orhttps://localhost:8443/idp). - Create an administrative user. You need to set the username and password for the admin user.
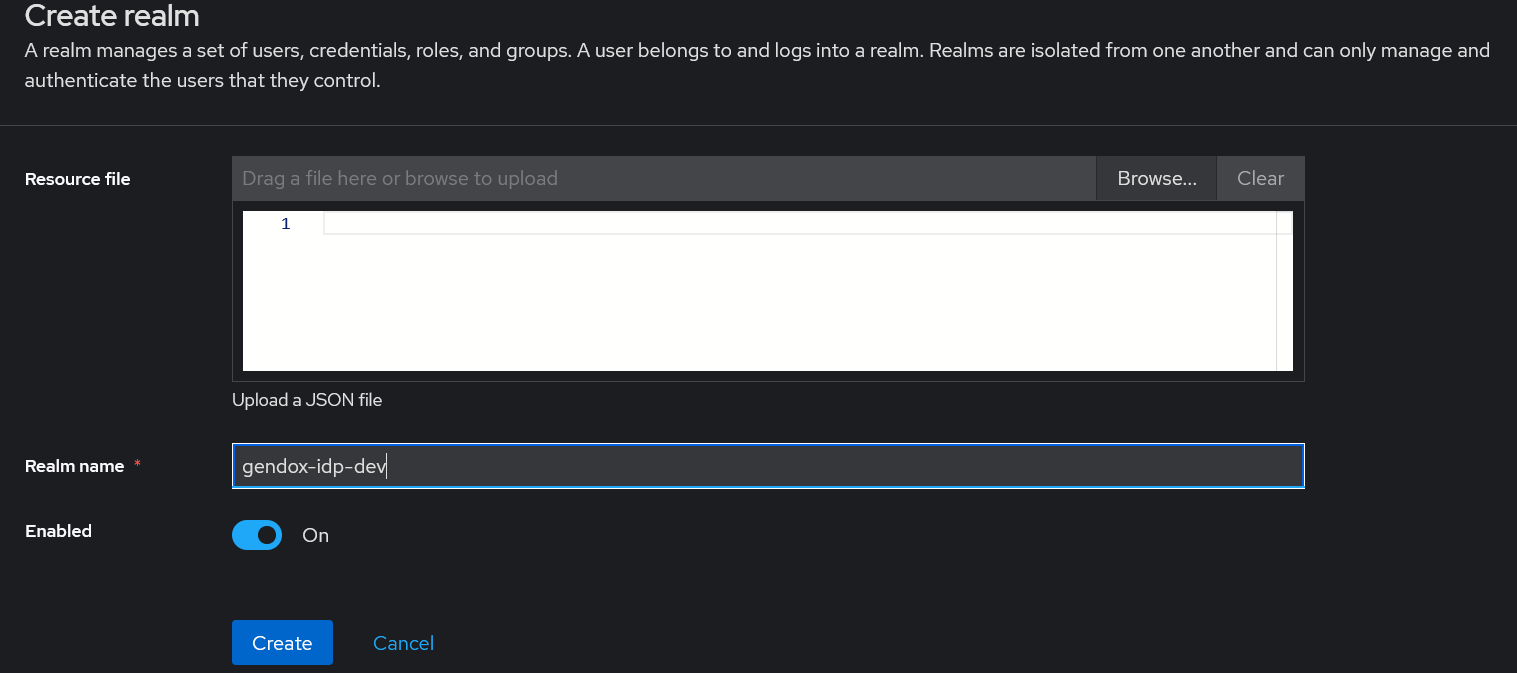
Step 2: Create gendox-idp-dev realm
Open the Administration Consoler after creating the admin user. There is a default master realm created. Click on create realm and enter as name gendox-idp-dev.
Step 3: Fill in admin user information
Switch to master real and under the Users you will se the admin user. Fill in the email of the user as well as the first and last name of the user.
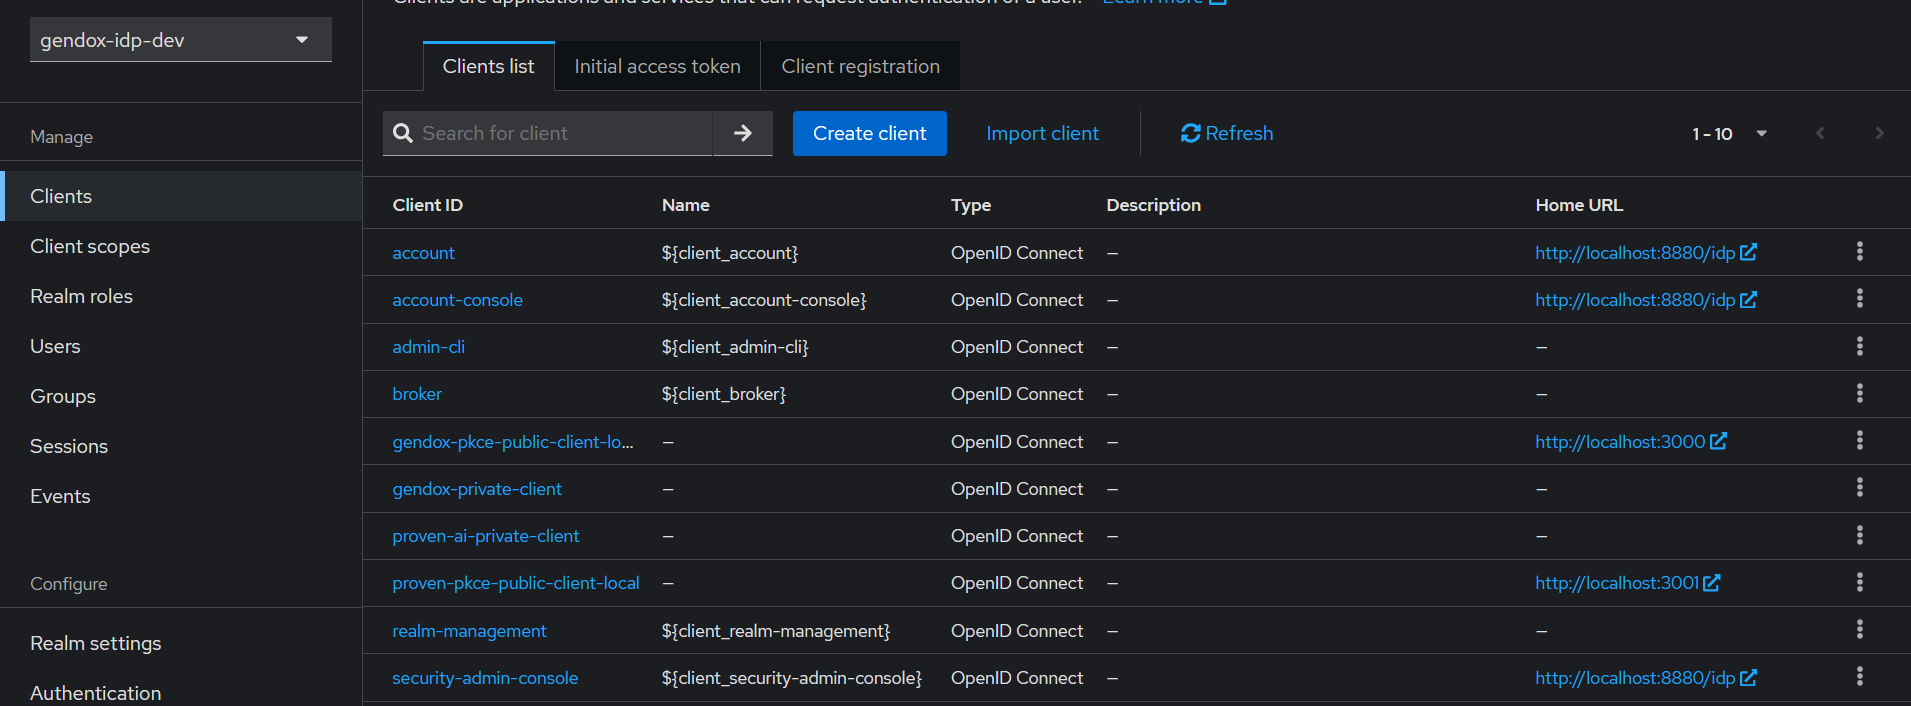
Step 4: Configure realm clients
Navigate to clients to configure clients settings.
- Create
gendox-pkce-public-client-localclient. Fill in the client information with the following values:
| Category | Field | Value |
|---|---|---|
| General settings | Client ID * | gendox-pkce-public-client-local |
| Name | Local Gendox PKCE client | |
| Description | PKCE Public Client for gendox | |
| Always display in UI | On | |
| Access settings | Root URL | http://localhost:3000 |
| Home URL | http://localhost:3000 | |
| Valid redirect URIs | http://localhost:3000/* | |
| Valid post logout redirect URIs | http://localhost:3000/login | |
| Web origins | http://localhost:3000 | |
| Admin URL | http://localhost:3000 | |
| Capability config | Client authentication | Off |
| Authorization | Off | |
| Authentication flow | Standard flow | |
| Authentication flow | Direct access grants | |
| Direct access grants | On | |
| Implicit flow | Off | |
| OAuth 2.0 Device Authorization Grant | Off |
We note here that 3000 is the port for gendox frontend.
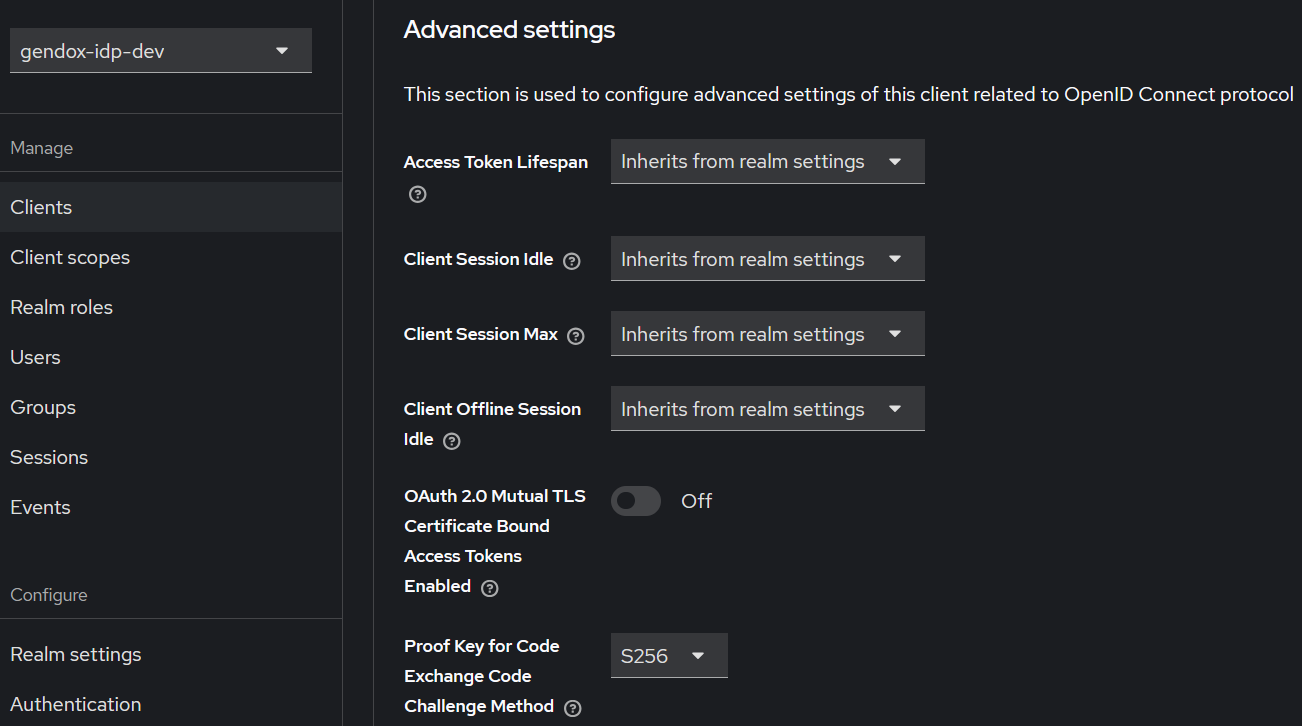
We also need to modify the following under advanced settings:
| Category | Field | Value |
|---|---|---|
| Advanced Settings | Proof Key for Code Exchange Code Challenge Method | S256 |
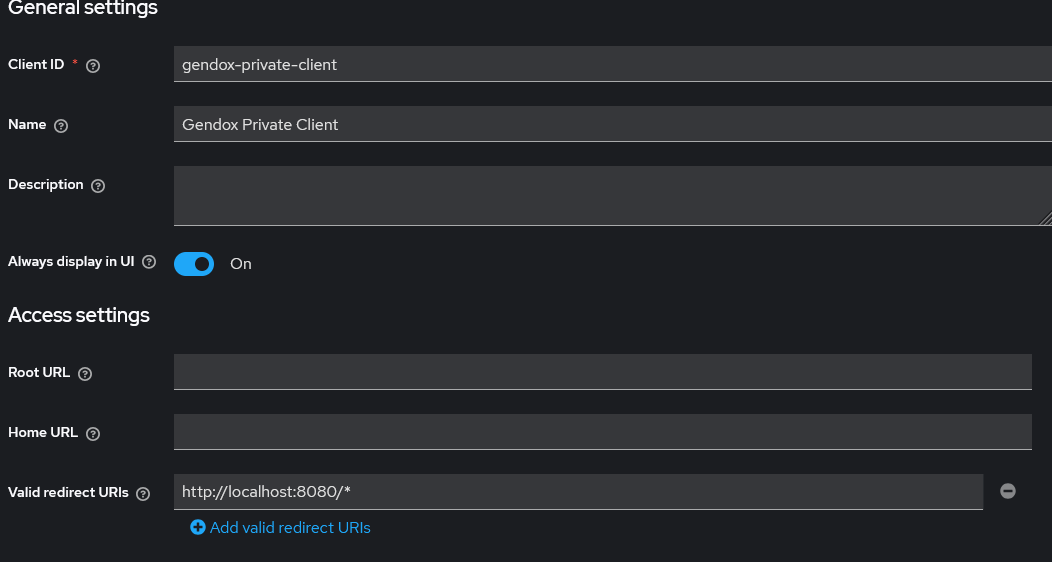
- Create
gendox-private-clientclient. Fill in the client information with the following values:
| Category | Field | Value |
|---|---|---|
| General settings | Client ID * | gendox-public-client |
| Name | gendox-public-client | |
| Description | Public client to use in the frontend! | |
| Always display in UI | On | |
| Access settings | Valid redirect URIs | |
| Web origins | ||
| Capability config | Client authentication | Off |
| Authorization | Off | |
| Authentication flow | Standard flow | |
| Authentication flow | Direct access grants | |
| Authentication flow | Service accounts roles | |
| Direct access grants | On | |
| Implicit flow | Off | |
| OAuth 2.0 Device Authorization Grant | Off |
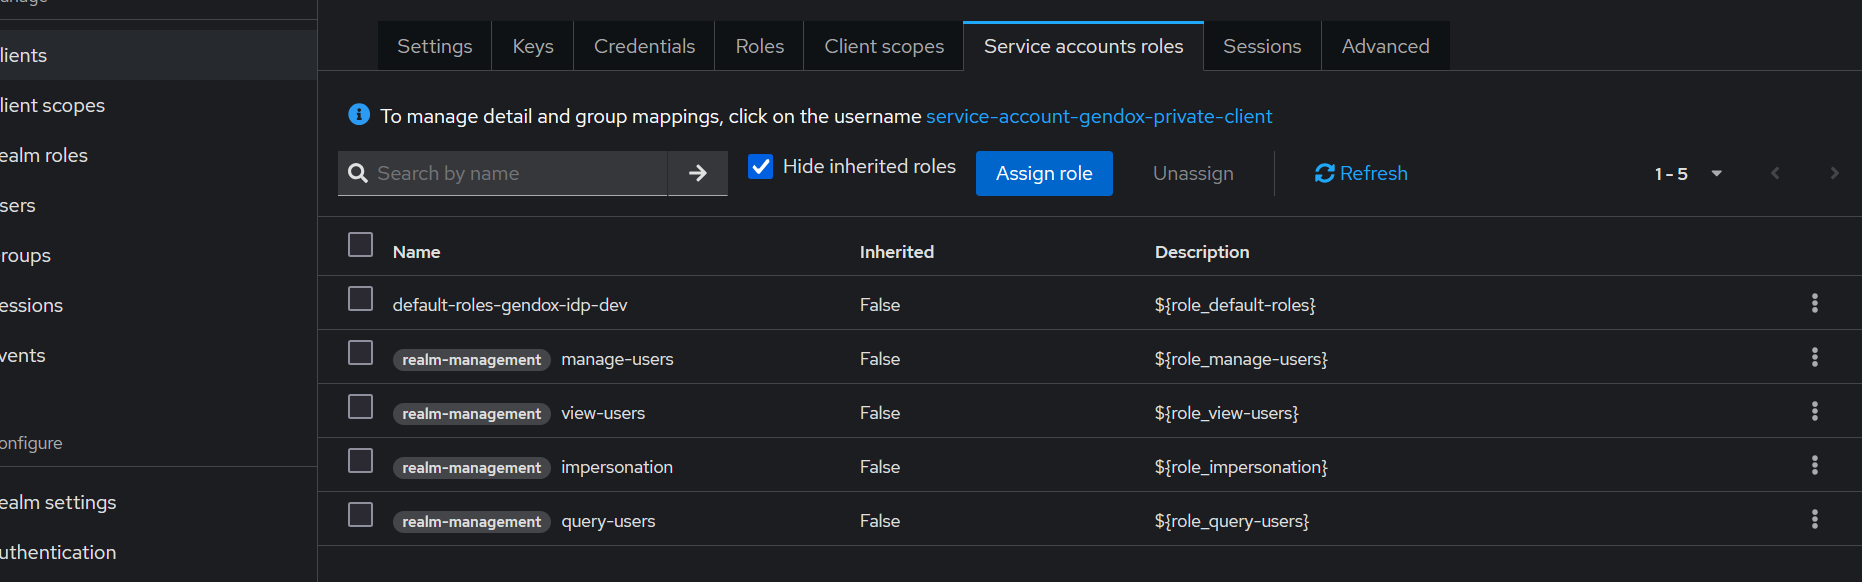
Under the Service account roles we need to assign the following roles:
manage-usersimpersonationview-usersquery-users
- Create
proven-ai-private-clientclient. Fill in the client information with the following values:
| Category | Field | Value |
|---|---|---|
| General settings | Client ID * | proven-ai-private-client |
| Name | ProvenAI Private Client | |
| Always display in UI | On | |
| Access settings | Valid redirect URIs | |
| Web origins | ||
| Capability config | Client authentication | On |
| Authorization | Off | |
| Authentication flow | Standard flow | |
| Authentication flow | Direct access grants | |
| Authentication flow | Service accounts roles | |
| Direct access grants | On | |
| Implicit flow | Off | |
| OAuth 2.0 Device Authorization Grant | Off |
Then create the following role under the Roles section:
| Field | Value |
|---|---|
| Role name * | uma_protection |
| Description |
Under the Service account roles we need to assign the following roles:
-
manage-users -
impersonation -
view-users -
query-users -
uma_protection -
Create
proven-pkce-public-client-localclient. Fill in the client information with the following values:
| Category | Field | Value |
|---|---|---|
| General settings | Client ID * | proven-pkce-public-client-local |
| Name | Local Gendox PKCE client | |
| Description | PKCE Public Client for gendox | |
| Always display in UI | On | |
| Access settings | Root URL | http://localhost:3001 |
| Home URL | http://localhost:3001 | |
| Valid redirect URIs | http://localhost:3001/* | |
| Valid post logout redirect URIs | http://localhost:3001/login | |
| Web origins | http://localhost:3001 | |
| Admin URL | http://localhost:3001 | |
| Capability config | Client authentication | Off |
| Authorization | Off | |
| Authentication flow | Standard flow | |
| Authentication flow | Direct access grants | |
| Direct access grants | On | |
| Implicit flow | Off | |
| OAuth 2.0 Device Authorization Grant | Off |
We note here that 3001 is the port for provenAI frontend.
We also need to modify the following under advanced settings:
| Category | Field | Value |
|---|---|---|
| Advanced Settings | Proof Key for Code Exchange Code Challenge Method | H256 |
When you configure all the required clients and the realm you will need to execute steps 4-7 as described in Automatic client and realm setup, to complete the keycloak configuration.